This post will walk through the creation of a realtime chat application using Ably Chat with Next.js and deploying it to Vercel.
You'll learn how to:
- Create a brand new Next.js application
- Adding realtime functionality with Ably
- Create a Next.js Vercel Serverless API
- Use React Hooks with Ably
- Host your app on Vercel
Check out a running version of the app or fork the app on GitHub.
StarWebSockets in Vercel with Ably
Vercel allows users to deploy Serverless Functions, which are essentially just blocks of code that provide a response to an HTTP request. However, these functions have a maximum execution timeout, which means that it is not possible to maintain a WebSocket connection this way.
This is where Ably comes in. The client can connect to an Ably Chat room and send and receive messages on it to add realtime functionality to your app by managing your WebSocket connections for you.
We’ll start by going over how to build an app that uses realtime functionality.
This is absolutely wonderful. Think serverless https://t.co/KQPuGDLPMl! https://t.co/LGoHjcrYZQ
— Guillermo Rauch (@rauchg) March 2, 2021
What are we going to build?
We’re building a realtime chat app that runs in the browser. It will be built upon the Next.js create-next-app template and contain a React component that uses Ably Chat SDK to send and receive messages. In this tutorial, we’re specifically using @ably/chat/react in Ably Chat SDK instead of the lower-level class API. Hooks let us confine all realtime logic to the browser (so it won’t run in Next.js server components), automatically manage subscribe/cleanup lifecycles, and slot neatly into our React component tree on Vercel. We’ll walk through integrating the SDK to build a UI for sending and receiving messages in realtime. We'll also write a Next.js serverless function that will be used to connect to the Ably Chat SDK.
Here's the finished deployment:
A bit about Ably Chat
At its core, the Ably Chat SDK is built on Ably’s globally-distributed, low-latency data stream network. Messages are exchanged through chat "rooms," which wrap around Ably Channels to offer chat-specific functionality. When a user sends a message, it is published to the room, and all other members subscribed to the room immediately receive it. This pub/sub model ensures reliable, instant delivery between connected clients.
Traditionally you would publish and subscribe directly on raw channels, but in this tutorial we’re using Ably Chat SDK’s React Hooks to simplify everything. All of these hooks play well in your Client Components, automatically managing lifecycle and cleanup when components mount or unmount.
Beyond basic message exchange, Ably Chat supports a wide range of chat features out of the box, including typing indicators, presence events, read receipts, message history, and even edit/delete support. Check out our docs to learn more.
1. Setting up dependencies
To build this app, you’ll need:
- An Ably account for sending messages: Create an account with Ably for free.
- A Vercel account for hosting on production: Create an account with Vercel for free.
- Node 14.2.3: Install Node.
Once you have your Ably account you'll need an API key to authenticate with the Ably Service. To get an API key:
- Visit your app dashboard and click on Create New App.
- Give the new app a name.
- Copy the Private API key once the app has been created. Keep it safe! This is how you will authenticate with the Ably service.
Vercel already provides the Next.js command line tools to help us. They don't need to be installed on your system, as they're executed using npx.
2. Scaffolding the Next.js chat app
Start building the chat application by using create-next-app to scaffold a new Next.js-based application. In your terminal, type:
npx create-next-app@latest
Answer the prompts as follows:
What is your project named? nextjs-chat-app
Would you like to use TypeScript? No
Would you like to use ESLint? Yes
Would you like to use Tailwind CSS? No
Would you like to use `src/` directory? No
Would you like to use Turbopack for `next dev`? No
Would you like to use App Router? (recommended) Yes
Would you like to customize the default import alias? No
What import alias would you like configured? @/*
After the prompts, create-next-app will create a folder with your project name and install the required dependencies. Change directories into your application directory:
cd nextjs-chat-app
Next, create a file called .env in the root of the directory. This is where we'll put the project's environment variables. Add your Ably API key to the .env file:
ABLY_API_KEY=your-ably-api-key:goes-here
Test that the application runs correctly by running the following command:
npm run dev
The Next.js dev server will spin up and you'll see a default Next.js starter app. This is what we'll build our chat app on top of.
The realtime chat app architecture
The topology of our Next.js app will look like this:
─ .env
├─ .gitignore
├─ package-lock.json
├─ package.json
├─ README.md
|
├─── components
│     ├─ Chat.jsx
|     ├─ ChatBox.jsx
│     ├─ ChatBox.module.css
|
├─── app
│    ├─ globals.css
│    ├─ layout.js
│    ├─ page.js
│    │
│    └─── api
│          └─ route.js
│
└─── public
/app/page.jsis the home page/app/api/route.jsis our Ably token authentication API/components/Chat.jsxis the main chat host component/components/ChatBox.jsxthe component that contains the actual chat UI/components/ChatBox.module.csscontains the styles for the chat component
Let's walk through how this application is built.
3. Authenticating an Ably client
There are a number of ways to authenticate an Ably client. For our application, we’ll use token authentication. Token authentication uses a trusted device with an API key, in our case an API route that we’ll build using Next.js, to issue time-limited tokens to untrusted clients.
In version 15, Next.js introduced the new App Router. Built on React Server Components it supports shared layouts, nested routing, loading states, error handling, and more including API routes via its Route Handler feature. Let's build that API route.
Start by installing the Ably npm package in the root of your new app:
npm install ably
npm install @ably/chat
Next, create a file called ./app/api/route.js. Add the following code:
import Ably from "ably";

// ensure Vercel doesn't cache the result of this route,
// as otherwise the token request data will eventually become outdated
// and we won't be able to authenticate on the client side
export const revalidate = 0;

export async function GET(request) {
  const client = new Ably.Rest(process.env.ABLY_API_KEY);
  const tokenRequestData = await client.auth.createTokenRequest({
    clientId: "ably-chat-demo",
  });
  return Response.json(tokenRequestData);
}
This function uses the Ably SDK to create a tokenRequest with your API key. The token will be used later - it allows you to keep your "real" API key safe while using it in the Next.js app. By default, this API is configured to be available on http://localhost:3000/api/. We're going to provide this URL to the Ably Chat SDK in our client to authenticate with Ably.
Next.js server vs. client components
Before we start creating pages in our application, it’s important to understand how Next.js renders content. The framework supports multiple rendering methods including server-side rendering (SSR), static-site generation (SSG), and client-side rendering (CSR). There are many pros and cons to each rendering method (too many to cover in this post), so if these concepts are new to you, Google’s web.dev site has a very good introduction to rendering on the web that can help you understand rendering options.
Next.js defaults to server-side rendering—meaning the page HTML is generated on the server for each request and sent to the browser. This means that by default when you create a new component in your React app, you are creating a Server Component.
Server Components offer a lot of benefits, but one drawback is that they don’t have access to browser APIs. To allow you to create components that can access those APIs, Next.js also includes the ability to create Client Components.
To indicate that you want a component to be a Client Component, you use React’s ’use client’ directive at the top of your component. Doing this tells Next.js that it should render the component in the browser, not on the server.
Our chat UI (components/Chat.jsx) needs to open a realtime WebSocket connection via the Ably SDK and run React hooks in the browser, so we simply add 'use client'; at the top of that file. Next.js will then automatically exclude it from server renders - no lazy loading or dynamic imports required.
4. Building the components
In the root of your application, create a new components folder and within create a new React component file named Chat.jsx. Scaffold the initial component using the code below:
'use client';

import * as Ably from 'ably';
import { ChatClient, AllFeaturesEnabled } from '@ably/chat';
import { ChatClientProvider, ChatRoomProvider } from '@ably/chat/react';
import ChatBox from './ChatBox.jsx';

const roomOptions = {
  history: { limit: 50 },
  reactions: {}
};

export default function Chat() {
  const realtimeClient = new Ably.Realtime({ authUrl: '/api' });
  const chatClient = new ChatClient(realtimeClient);

  return (
    <ChatClientProvider client={chatClient}>
      <ChatRoomProvider id="chat-demo" options={roomOptions}>
        <ChatBox />
      </ChatRoomProvider>
    </ChatClientProvider>
  );
}
Pages in Next.js are React components, so the app/page.js home page is the React component that contains the page layout.
Open page.js and replace the default scaffolded content with this markup:
import Head from 'next/head';
import dynamic from 'next/dynamic';
const Chat = dynamic(() => import('../components/Chat'), {
ssr: false,
});
export default function Home() {
return (
<div className="container">
<Head>
<title>Realtime Chat App with Ably Chat, Next.js and Vercel</title>
<link rel="icon" href="https://static.ably.dev/motif-red.svg?nextjs-vercel" type="image/svg+xml" />
</Head>
<main>
<h1 className="title">Ably Chat Demo</h1>
<Chat />
</main>
<footer>
Powered by <a href="https://vercel.com" target="_blank" rel="noopener noreferrer">Vercel</a> and <a href="https://ably.com" rel="noopener noreferrer">Ably</a>
<a href="https://github.com/ably-labs/NextJS-chat-app" className="github-corner" aria-label="View source on GitHub">
<svg width="80" height="80" viewBox="0 0 250 250" className="svg" aria-hidden="true">
<path d="M0,0 L115,115 L130,115 L142,142 L250,250 L250,0 Z"></path>
<path d="M128.3,109.0 C113.8,99.7 119.0,89.6 119.0,89.6 C122.0,82.7 120.5,78.6 120.5,78.6 C119.2,72.0 123.4,76.3 123.4,76.3 C127.3,80.9 125.5,87.3 125.5,87.3 C122.9,97.6 130.6,101.9 134.4,103.2" fill="currentColor" className="octo-arm"></path><path d="M115.0,115.0 C114.9,115.1 118.7,116.5 119.8,115.4 L133.7,101.6 C136.9,99.2 139.9,98.4 142.2,98.6 C133.8,88.0 127.5,74.4 143.8,58.0 C148.5,53.4 154.0,51.2 159.7,51.0 C160.3,49.4 163.2,43.6 171.4,40.1 C171.4,40.1 176.1,42.5 178.8,56.2 C183.1,58.6 187.2,61.8 190.9,65.4 C194.5,69.0 197.7,73.2 200.1,77.6 C213.8,80.2 216.3,84.9 216.3,84.9 C212.7,93.1 206.9,96.0 205.4,96.6 C205.1,102.4 203.0,107.8 198.3,112.5 C181.9,128.9 168.3,122.5 157.7,114.1 C157.9,116.9 156.7,120.9 152.7,124.9 L141.0,136.5 C139.8,137.7 141.6,141.9 141.8,141.8 Z" fill="currentColor" className="octo-body"></path></svg>
</a>
</footer>
</div>
)
}
Next, in the same app directory, locate the globals.css file and replace its contents with the basic CSS styles we’ll use in our application which you can find in the project’s GitHub repository.
Run the app. You should see this:
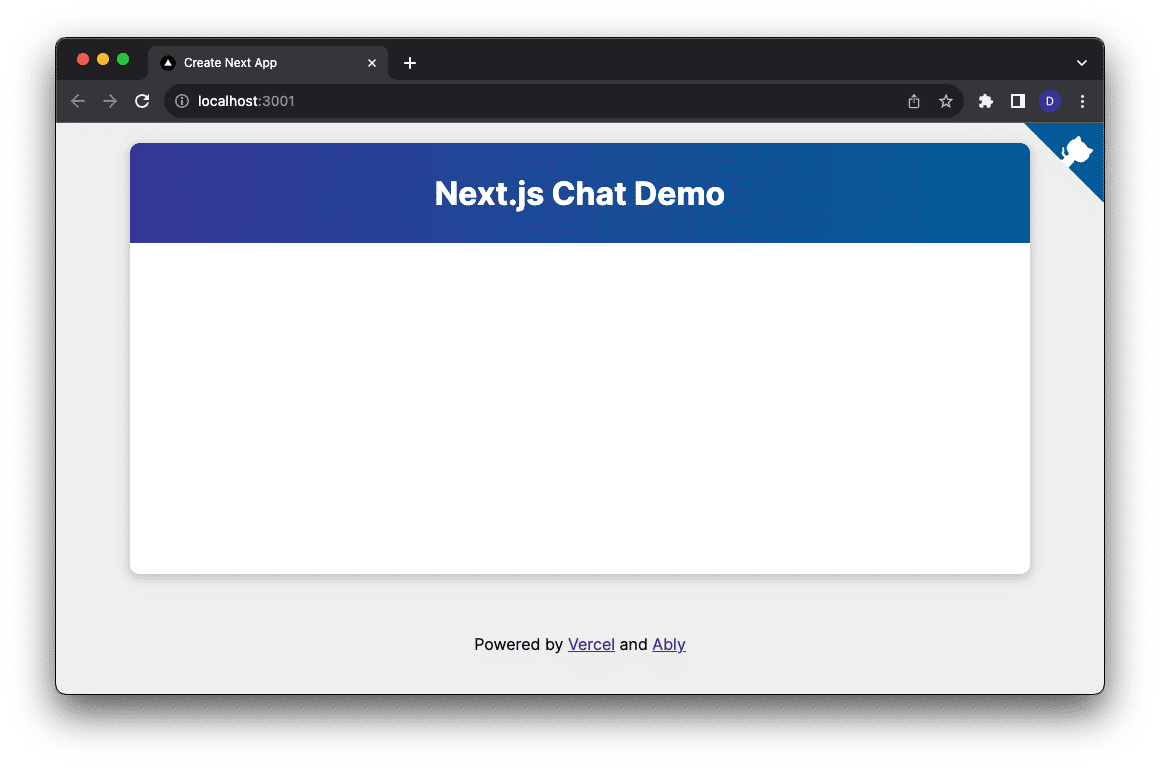
Run the app to validate everything is working properly. The Chat component is mounted and joined to a room, though you won’t see any visible UI yet. We'll add the actual chat interface in the next section.
5. Writing the chat component logic
The chat app logic is contained inside a new ChatBox component. To build this, start by creating two new files in the components directory: ChatBox.jsx and ChatBox.module.css.
You can copy the styles for ChatBox.module.css from the project’s GitHub repository. Next, open the ChatBox.jsx file and add the import statements we'll need at the top of the file:
import React, { useEffect, useState, useRef } from 'react';
import { useMessages } from '@ably/chat/react';
import styles from './ChatBox.module.css';
Initialize ChatBox
Define the ChatBox component, and add variables to the function to store references to some of the HTML elements in the code.
export default function ChatBox() {
const inputBox = useRef(null);
const messageEndRef = useRef(null);
}
Set up the state properties used in the component:
const [messageText, setMessageText] = useState('');
const [messages, setMessages] = useState([]);
const messageTextIsEmpty = messageText.trim().length === 0;
messageTextwill be bound to a textarea element where messages can be typedreceiveMessagesstores the on-screen chat historymessageTextIsEmptyis used to disable the send button when the textarea is empty
Listen for and render incoming messages
We’re using the useMessages hook from @ably/chat/react, which under the hood subscribes to the room’s message stream and calls your callback for each new message. You don’t need to manage subscribe/unsubscribe yourself - just pass a listener function into useMessages, and it will give you a send method plus realtime updates.
Add the following to ChatBox.jsx:
const { send: sendMessage } = useMessages({
  listener: (payload) => {
    const newMessage = payload.message;
    setMessages((prevMessages) => {
      if (prevMessages.some((existingMessage) => existingMessage.isSameAs(newMessage))) {
        return prevMessages;
      }

      const index = prevMessages.findIndex((existingMessage) =>
        existingMessage.after(newMessage)
      );

      const newMessages = [...prevMessages];
      if (index === -1) {
        newMessages.push(newMessage);
      } else {
        newMessages.splice(index, 0, newMessage);
      }
      return newMessages;
    });
  },
});
- Listener callback: Runs for every incoming message payload, extracting the structured message object.
- Deduplication: We check
isSameAs(newMessage)to avoid showing the same message twice. - Ordered insertion: We compute an index using
after(), then insert the new message at the correct chronological position - or append it if it’s the newest. - Automatic cleanup: The hook manages subscribe/unsubscribe for you when the component mounts or unmounts.
Handle sending messages
To send a chat message, we’ll define a few helper functions:
sendChatMessage()publishes the message to the Ably room.handleFormSubmission()is tied to the form’s onSubmit event, which prevents a page reload and calls the send function.handleKeyPress()checks for the Enter key and sends the message directly if pressed inside the textarea.
These get added to to ChatBox.jsx:
const sendChatMessage = async (text) => {
  if (!sendMessage) {
    // hook isn’t ready yet
    return;
  }
  try {
    // send via Ably Chat SDK
    await sendMessage({ text });
    // clear out the textarea and restore focus
    setMessageText('');
    inputBox.current?.focus();
  } catch (error) {
    console.error('Error sending message:', error);
  }
};

const handleFormSubmission = (event) => {
  event.preventDefault();
  sendChatMessage(messageText);
};

const handleKeyPress = (event) => {
  // only send on plain Enter (not Shift+Enter)
  if (event.key !== 'Enter' || event.shiftKey) {
    return;
  }
  event.preventDefault();
  sendChatMessage(messageText);
};
Rendering messages in the chat UI
Next, we need to construct the UI elements to display the messages. To do this, we will map the received Ably messages into HTML span elements:
const messageElements = messages.map((message, index) => {
   const key = message.serial ?? index;
   return (
     <span key={key} className={styles.message}>
       {message.text}
     </span>
   );
 });
sendChatMessage(text)checks thatsendMessageis available, then awaits it to publish your payload. On success, it clears the input and focuses it; on failure, it logs the error.handleFormSubmissionprevents the default page reload and delegates tosendChatMessage.handleKeyPresslooks for the Enter key (ignoring Shift+Enter line breaks), prevents the newline, and sends the message immediately.
Adding auto-scrolling
In order to keep the message box scrolled to the most recent message (the one on the bottom) we'll need to add an empty div element into the message container, which will then be scrolled into view whenever the components re-renders. This is the element that we'll add to the UI:
<div className={styles.chatText}>
  {messageElements}
  <div ref={messageEndRef} />
</div>
We use a useEffect hook along with scrollIntoView() to scroll the message history to the bottom whenever the component renders.
useEffect(() => {
    messageEndRef.current?.scrollIntoView({ behavior: 'smooth' });
  }, [messages]);
Returning the UI markup
Finally, we will write the React component markup with the event handlers all bound to the onChange and onKeyPress events in JSX.
The markup itself is just a few div elements and a form with a textarea for user input. There are two calls to the react ref function, which allows us to capture a reference to the elements when they are rendered so that we can interact with them in JavaScript. The returned markup will look like this:
 return (
   <div className={styles.chatHolder}>
     <div className={styles.chatText}>
       {messageElements}
       <div ref={messageEndRef}></div>
     </div>
     <form onSubmit={handleFormSubmission} className={styles.form}>
       <textarea
         ref={inputBox}
         value={messageText}
         placeholder={'Type a message...'}
         onChange={(e) => setMessageText(e.target.value)}
         onKeyPress={handleKeyPress}
         className={styles.textarea}
       ></textarea>
       <button type="submit" className={styles.button} disabled={messageTextIsEmpty}>
         Send
       </button>
     </form>
   </div>
 );
Swap over to your browser (make sure you restart the application server if you need to) and you should see a functioning chat application now.
6. Hosting on Vercel
We're using Vercel as our development server and build pipeline.
As we mentioned at the beginning, in order to deploy your new chat app to Vercel, you'll need to:
- Create a GitHub account (if you don't already have one)
- Push your app to a GitHub repository
- Create a Vercel account
- Create a new Vercel app and import your app from your GitHub repository. (This will require you to authorize Vercel to use your GitHub account)
- Add your
ABLY_API_KEYas an environment variable - Watch your app deploy
- Visit the newly created URL in your browser!
7. Make it your own
There are a few ways that this example could be extended:
Add message history
There is currently no chat history in this demo - you'll only see messages that come in after you join the chat. You could expand this demo by using Ably Chat's built-in message history to retrieve messages sent earlier, like this:
import { useMessages } from '@ably/chat/react';

const MyComponent = () => {
  const { get } = useMessages();

  const handleGetMessages = () => {
    // fetch the last 3 messages, oldest to newest
    get({ limit: 3, orderBy: OrderBy.OldestFirst })
      .then((result) =>
        console.log('Previous messages: ', result.items));
  };

  return (
    <div>
      <button onClick={handleGetMessages}>Get Messages</button>
    </div>
  );
};
Add room reactions
Use the useRoomReactions Chat React Hook to both send reactions and listen for incoming reaction events. The hook returns a send function; you register a listener to update your own React state when a new reaction arrives. Here’s how to incorporate it in ChatBox.jsx. First, add this import statement at the top:
import { useRoomReactions } from '@ably/chat/react';
Add typing indicators
You can show when other users are typing using the Chat React Hook useTyping. Just incorporate it into the existing ChatBox.jsx with this import statement:
import { useTyping } from '@ably/chat/react';
Learn more about typing indicators in the Ably Chat typing indicator docs.
Let us know
Hope you have enjoyed this tutorial. If you are interested in learning more about realtime in Next.js, check out these resources:
- Building a realtime SMS voting app... In the web
- Show SMS Notifications in the Browser with Next.JS, Ably, and Vercel
If this tutorial was helpful, or you're using Next.js and Ably in your project, we'd love to hear about it. Drop us a message on X or LinkedIn.
FAQs
What is the Ably Chat SDK and why use it with Next.js?
The Ably Chat SDK provides realtime messaging APIs built on Ably’s globally distributed data network. When integrated with Next.js, it simplifies WebSocket-style communication and enables features like presence, moderation, message history, typing indicators, and more.
How do you authenticate Ably clients securely in a Next.js app?
Authentication is handled using a serverless API route on Vercel. This route issues short-lived tokens based on your Ably API key, ensuring the secret key is never exposed while allowing clients to connect safely.
Can Vercel handle persistent WebSocket connections directly?
Not natively - Vercel serverless functions have timeouts that prevent persistent sockets. Ably solves this by maintaining realtime connections for you, while your Vercel app interacts through APIs and the Chat SDK.
How do you deploy a realtime chat app with Next.js to Vercel?
You push your project to GitHub, connect it to Vercel, set environment variables like ABLY_API_KEY, and deploy. Vercel handles the build and hosting, while Ably manages realtime messaging globally.
What features can I add to enhance the chat experience?
Beyond sending messages, you can use Ably’s Chat SDK to add moderation, typing indicators, room and message reactions, presence, read receipts, or message history. These features improve usability and make your chat app feel polished and production-ready. See the Ably Chat documentation for the full feature list.


