In the world of video livestreaming, emojis are the ultimate game-changers! These tiny icons pack a powerful punch, instantly amplifying audience engagement and sparking a connection with viewers.
Beyond being adorable expressions, emojis add an emotional touch to interactions, breaking down barriers between content creators and their audience. From heartfelt appreciation to genuine excitement, emojis speak volumes with their appearance.
In this article, we’ll explore how to combine api.video’s livestreaming capabilities with Ably’s realtime features to create an engaging communication experience.
Psst... did you know? Ably Chat natively supports emoji reactions, along with presence, messaging, and more - so you can add these features with minimal effort 🤯
How to build a scalable and engaging livestream with api.video and Ably
Let’s start by learning how to create an engaging livestream with the help of api.video and Ably.
- Use api.video to create and deliver the livestream
- Use Ably for all the realtime communication handling
- Use Open Broadcaster Software (OBS), one of api.video's livestreaming SDKs, or stream directly from the api.video dashboard
To create and deliver a livestream with api.video and include emoji engagement, you can clone this example that was built using Next.js.
Now, let’s look at what is happening on the backend with the api.video React Player module.
The api.video React Player module
To start with, use the api.video React player SDK in order to create a responsive on-screen video data delivery while removing the control elements.
- Navigate to the src/pages/index.tsx file to consume the player and build out the video delivery.
- To consume the api.video React player SDK import ApiVideoPlayer from '@api.video/react-player';.
- Now pass the ApiVideoPlayer as a component to be rendered.
<ApiVideoPlayer
     video={{ id: streamId, live: true }}
     videoStyleObjectFit={'cover'} // The object-fit CSS
     ref={videoRef}
     style={{
            width: size[0],
            height: size[1],
            display: "block",
            margin: "0 auto",
            }}
      autoplay
      chromeless  // Chromeless mode: all controls are hidden
      loop
      muted
 />
Disclaimer! In this example, the stream ID is hardcoded in the index file. You’ll probably want to serve the streamId dynamically from your backend when you get to production.
As you may have noticed, we are passing various props into the ApiVideoPlayer, so let’s see what they mean:
- With style, we are passing CSS parameters for the video to fit the screen while the size parameter is dynamic. Each time you resize the window, the video player size will adapt to the size of the screen:
const [size, setSize] = useState<number[]>([500, 500])

    React.useEffect(() => {
        setSize([window.innerHeight, window.innerWidth])
        window.addEventListener('resize', () => {
            setSize([window.innerHeight, window.innerWidth])
        })
				return () => {
					window.removeEventListener('resize', () => {
	            setSize([window.innerHeight, window.innerWidth])
	        })
				}
     }, [])
- With the chromeless parameter, you can remove all the player controls, which will give the user a better experience.
- With the video parameter, we are passing an object that includes the stream ID and the optional parameter live that is set to true in order to give the player the indication that we are passing in a live stream and not a video.
Now, getting the livestream ID can be done in two ways:
Programmatically
- You can leverage the livestream endpoint in order to get the list of livestream IDs from your workspace:
curl --request GET \
     --url 'https://ws.api.video/live-streams?currentPage=1&pageSize=25' \
     --header 'accept: application/json' \
     --header 'authorization: Basic xxxx='
2. You’ll get a JSON response from which you can get the livestream ID you need:
{
  "data": [
    {
      "liveStreamId": "xyxyxyxyx",
      "createdAt": "2023-03-02T15:01:34+00:00",
      "updatedAt": "2023-03-02T15:01:34+00:00",
      "streamKey": "aaabbbccc",
      "name": "My live stream",
      "public": true,
      "record": false,
      "broadcasting": false,
      "assets": {
        "iframe": "<iframe src=\"https://embed.api.video/live/xyxyxyxyx\" width=\"100%\" height=\"100%\" frameborder=\"0\" scrolling=\"no\" allowfullscreen=\"true\"></iframe>",
        "player": "https://embed.api.video/live/xyxyxyx",
        "hls": "https://live.api.video/xyxxyxyx.m3u8",
        "thumbnail": "https://live.api.video/xyxyxyx/thumbnail.jpg"
      }
    },
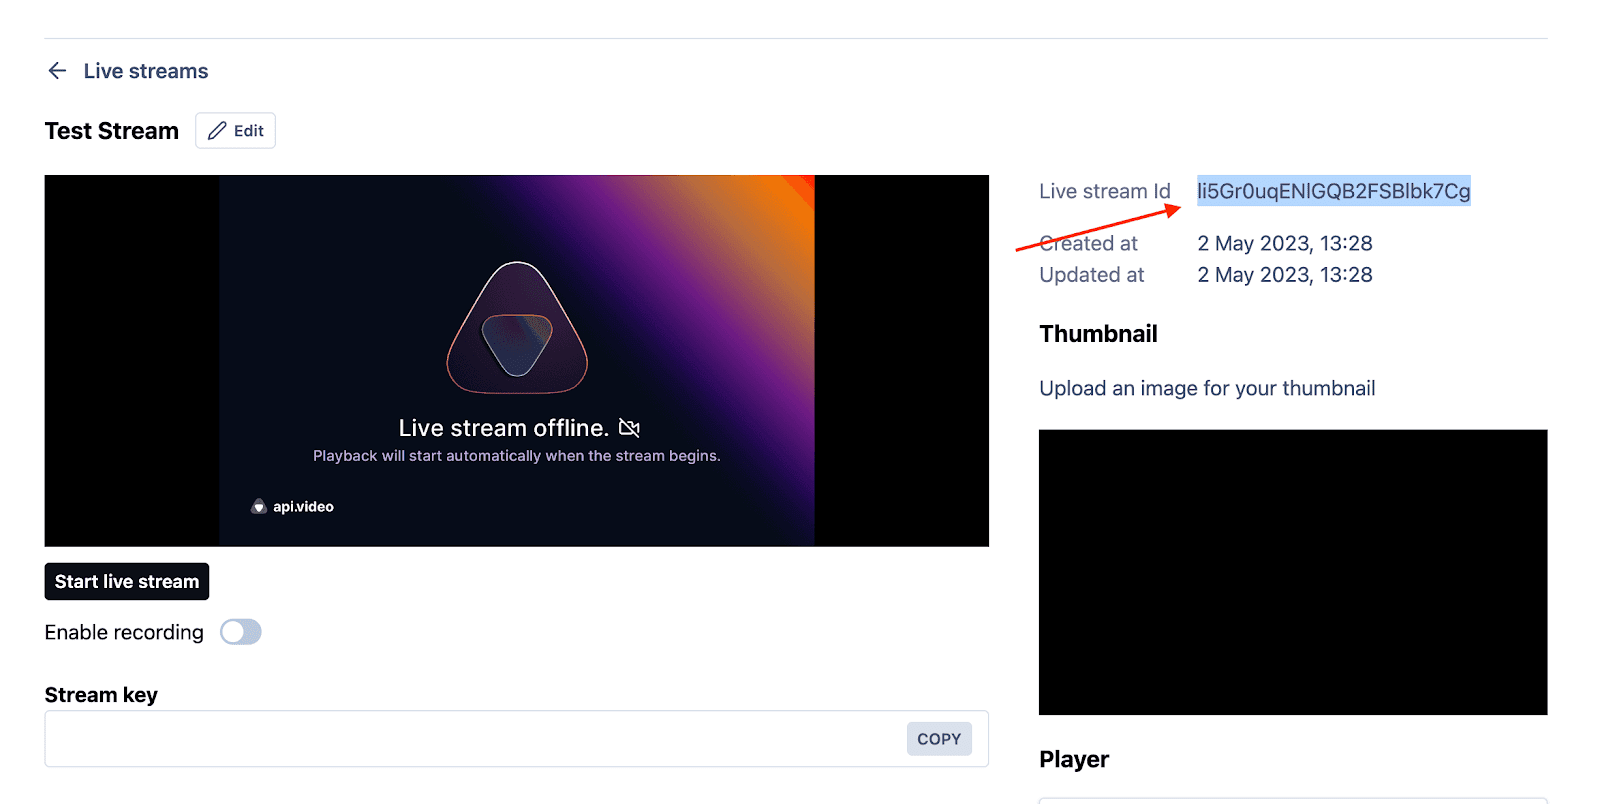
Manually from the dashboard
- Click on the respective livestream under ‘Live streams’
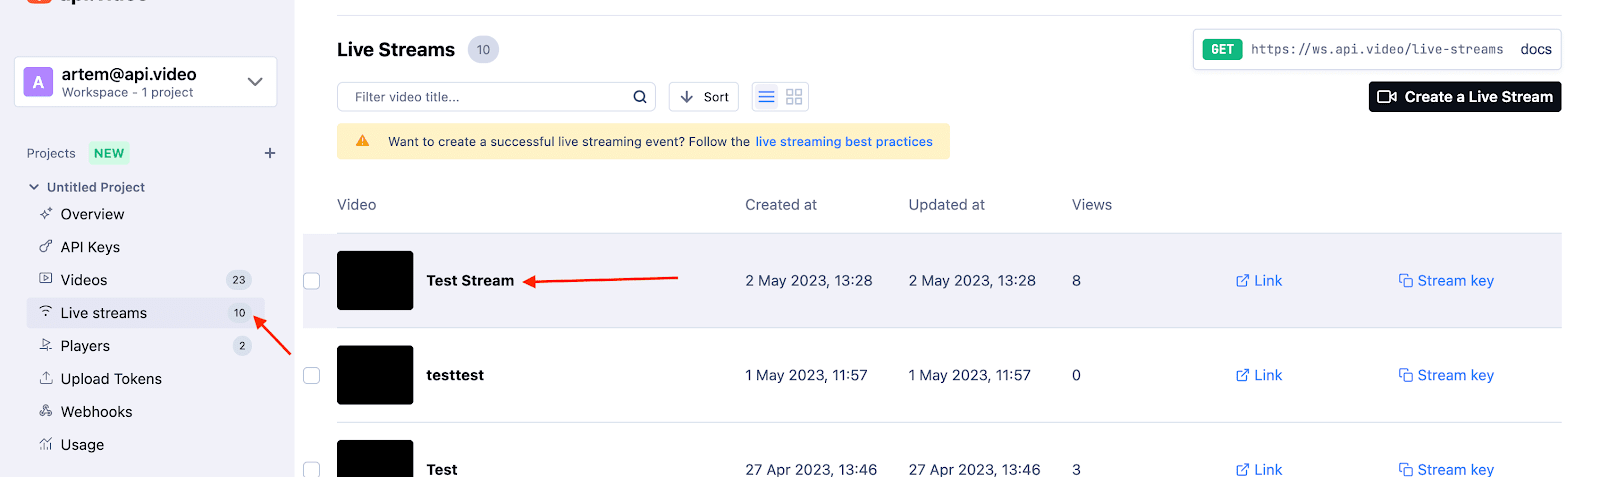
2. Get the livestream ID
Introducing emojis into the livestream app
Now that we know how to livestream a video via api.video, let’s see how you can share emojis between all the viewers of the stream.
We will provide each person in the stream with an emoji picker. Once the emoji is clicked, a cool little animation will play where the emoji hovers and then disappears. This animation will be played to all the viewers.
This emoji animation (shown above) is built with React Simple Animate and has a slightly complex logic, but you are free to re-use it in your app. You can find the actual animation parameters in src/utils/randomframevalues.tsx.
The random values are passed to the <AnimateKeyframes> component that includes the actual emoji:
const genFlyingEmojisComponent = (emoji: any) => {
        const keyFramesArray = randomFrameValues()
        const animateEmojis =
        [<AnimateKeyframes
            play
            delay={0}
            duration={2}
            iterationCount={1}
            direction="alternate"
            keyframes={keyFramesArray}
            >
            {emoji}
        </AnimateKeyframes>]
        return animateEmojis;
    }
Now it's time for the fun part - playing around with the random values and the parameters!
The main challenge: Spreading the emojis
Now we get to the challenge; how do you get these emojis across to all the other users?
Normally this would be a complex task due to the unpredictable fan-out ranging from tens to potentially millions of users all needing to receive the updates within milliseconds of one another to create a realtime experience. We’ll be using Ably as they handle this scalability problem for us.
We (the api.video team) created a new class that is called MessageHandler where we use the Ably node library:
import Ably from 'ably';
Ably has a great API that allows you to create channels, get users to subscribe to them, and then broadcast and listen to any events that happen inside these channels.
In the example, all you need to do is to replace the values of the #apiKey with the one that you get from Ably:
// Your Ably keys
    #apiKey = 'sqLe5g.xxxxxxxxxxxxxxxxxxxxx';
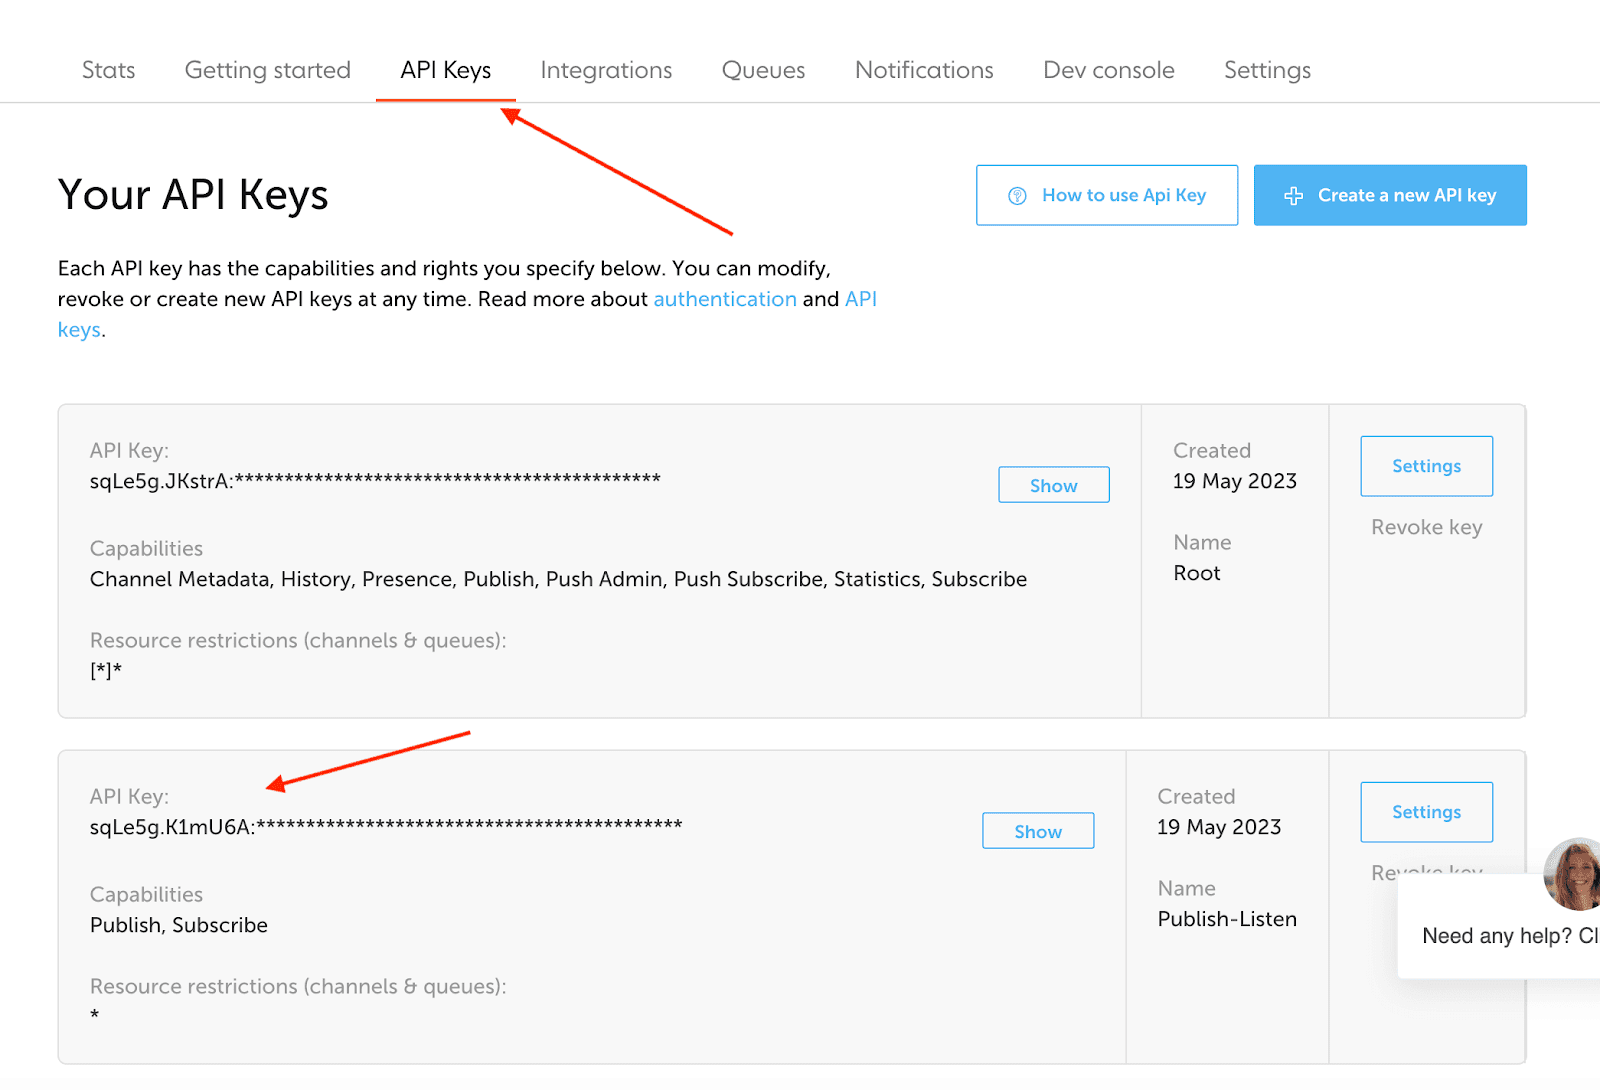
Disclaimer! Please note that these keys should be used only on the backend. In this example, just to make it easy, we expose the keys on the frontend. Please ensure that the backend serves instead generates tokens from the keys for clients when you go to production.
Every time the user opens a new window, they will be assigned a user ID for a session (this logic is in the index.tsx file). The user ID is then passed to the class when it is initialized in order to create a unique user ID for each user that watches the stream.
We then use the stream ID as the channel ID for Ably (you can generate any channel ID though, but it is easier to just leverage the values that we already have). We then subscribe to the same channel and also broadcast the messages to it at the same time.
The caveat is that when we set the listener in the /src/components/emoji.tsx file, we have a logic that will make sure that the listener is not getting duplicated. We check if there are no listeners created already; if there aren’t, we create one. This situation is caused by the fact that each time the state changes, React will re-render and will run the same code again, causing the listener to be created multiple times. Hence, we do something like this:
React.useEffect(() => {
        if(msgHandler.channel.subscriptions.any.length === 0) {
            // make sure to add the listener only once
            console.log("Adding listener");
            msgHandler.channel.subscribe( (msg: any) => {
                if(msg.data.userId !== msgHandler.channel.messageHandler.userId) {
                    showRemoteEmoji(msg.data.message);
                    }
                })
            }
        });
Finally, there are two functions to generate the message (which will include the emoji) and publish the message to the channel.
Now that you know how it works, you can run the example yourself. Just make sure to install all the dependent modules by running npm install or yarn install.
After the installation is done, run the example by npm run dev.
The example will run on localhost:3000.
How do emojis help you?
Emojis do not just help you bring engagement to a livestream, but they’re also a great way to measure the success of your livestream. For instance:
- With emojis, you can count the total reactions from the users and get an insight into how well your livestream performed
- You can map the different times at which certain reactions came in, which you can use to get the most-liked and the least-liked parts of your livestream
- Emojis are also a fabulous way of getting realtime feedback from users while you are hosting your livestream, helping you change the direction of the livestream as per the feedback
Emojis in livestreams give you an immense amount of data for analysis indicating the reactions to your video content at specific times during them. They will form an important part of livestreams in the coming years, and it is important to adapt to their usage to make the most of the viewing experience for the viewer and the host.
If this article was helpful, and you would like to get started building engaging livestreams, sign up for free accounts with Ably and api.video.
Happy coding!