```shell
# Create a new Laravel project
composer create-project laravel/laravel ably-laravel-quickstart
cd ably-laravel-quickstart

# Install the Ably Broadcaster for Laravel
composer require ably/laravel-broadcaster

# Setup API route
php artisan install:api
```
6. Now run the two dev servers (PHP and Vite) in separate Terminal windows:
```shell
php artisan serve # http://localhost:8000
npm install
npm run dev
```
### (Optional) Install Ably CLI
Use the [Ably CLI](https://github.com/ably/cli) as an additional client to quickly test Pub/Sub features. It can simulate other clients by publishing messages, subscribing to channels, and managing presence states.
1. Install the Ably CLI:
```shell
npm install -g @ably/cli
```
2. Run the following to log in to your Ably account and set the default app and API key:
```shell
ably login
```
```laravel
BROADCAST_CONNECTION=ably
ABLY_KEY=your-api-key
```
In Laravel 12, broadcasting is enabled by default. Verify that `BroadcastServiceProvider` is included in `bootstrap/providers.php`:
```laravel
Publish the broadcasting configuration file if it doesn't exist:
```shell
php artisan install:broadcasting --ably
```
This will create the `config/broadcasting.php` file and add the Ably configuration automatically.
## Step 2: Create the event that will be broadcast
To send events from Laravel to Ably, create an event file by running the following command in your terminal:
```shell
php artisan make:event PublicMessageEvent
```
This command will create a `PublicMessageEvent.php` file in the `app/Events` directory. Replace the content of the file with following to handle the broadcasting of messages to a public channel:
```laravel
channelName = $channelName;
$this->message = $message;
}
/**
* Get the channels the event should broadcast on.
*
* @return array<\Illuminate\Broadcasting\Channel>
*/
public function broadcastOn(): array
{
return [new Channel($this->channelName)];
}
}
```
## Step 3: Add an API route to broadcast
To handle API requests from frontend, open the `routes/api.php` file and add following route:
```laravel
input('channelName');
$message = $request->input('message');
broadcast(new PublicMessageEvent($channelName, $message));
return response()->json(['success' => true, 'message' => 'Event broadcasted']);
})->middleware('throttle:60,1'); // 60 requests/minute are allowed.
```
This endpoint `public-event` will accept POST requests with `channelName` and `message` parameters, and broadcast the event to the specified channel.
## Step 4: Test the API route
To test the API route, first you need at least one client subscribed to the channel. You can use the Ably CLI to subscribe to a channel:
```shell
ably channels subscribe public:my-first-channel
```
Now you can publish a message to the channel using the API route you created in Step 3. You can use `curl` or any HTTP client to send a POST request:
```shell
curl --location --request POST 'localhost:8000/api/public-event' \
--header 'Content-Type: application/json' \
--data-raw '{
"channelName":"my-first-channel",
"message":"A message sent from my first client!"
}'
```
## Step 5: Frontend setup
Install `Ably's Pub/Sub JavaScript SDK`, Ably's fork of `laravel-echo`, and `axios` in your Laravel project:
```shell
npm install @ably/laravel-echo ably axios
```
Create or update `resources/js/bootstrap.js` to include Echo configuration:
```laravel
import axios from 'axios';
window.axios = axios;
window.axios.defaults.headers.common['X-Requested-With'] = 'XMLHttpRequest';
// Configure Laravel Echo with Ably
import Echo from '@ably/laravel-echo';
import * as Ably from 'ably';
window.Ably = Ably;
window.Echo = new Echo({
broadcaster: 'ably',
key: import.meta.env.VITE_ABLY_KEY, // Add this to your .env file as VITE_ABLY_KEY
});
```
## Step 6: Create a frontend file to listen for events
Create a new CSS stylesheet `resources/css/echo.css` and add the Tailwind imports:
```text
@tailwind base;
@tailwind components;
@tailwind utilities;
```
Now create a new Blade view file named `echo.blade.php` in the `resources/views` directory, which will be the page rendered in your browser as your front end client to publish and subscribe to a channel:
```laravel
Laravel Echo with Ably
@vite(['resources/css/app.css','resources/css/echo.css', 'resources/js/app.js'])
Laravel Echo with Ably Test
```
Add the route to serve the frontend file in `routes/web.php` to expose this new file to the browser:
```laravel
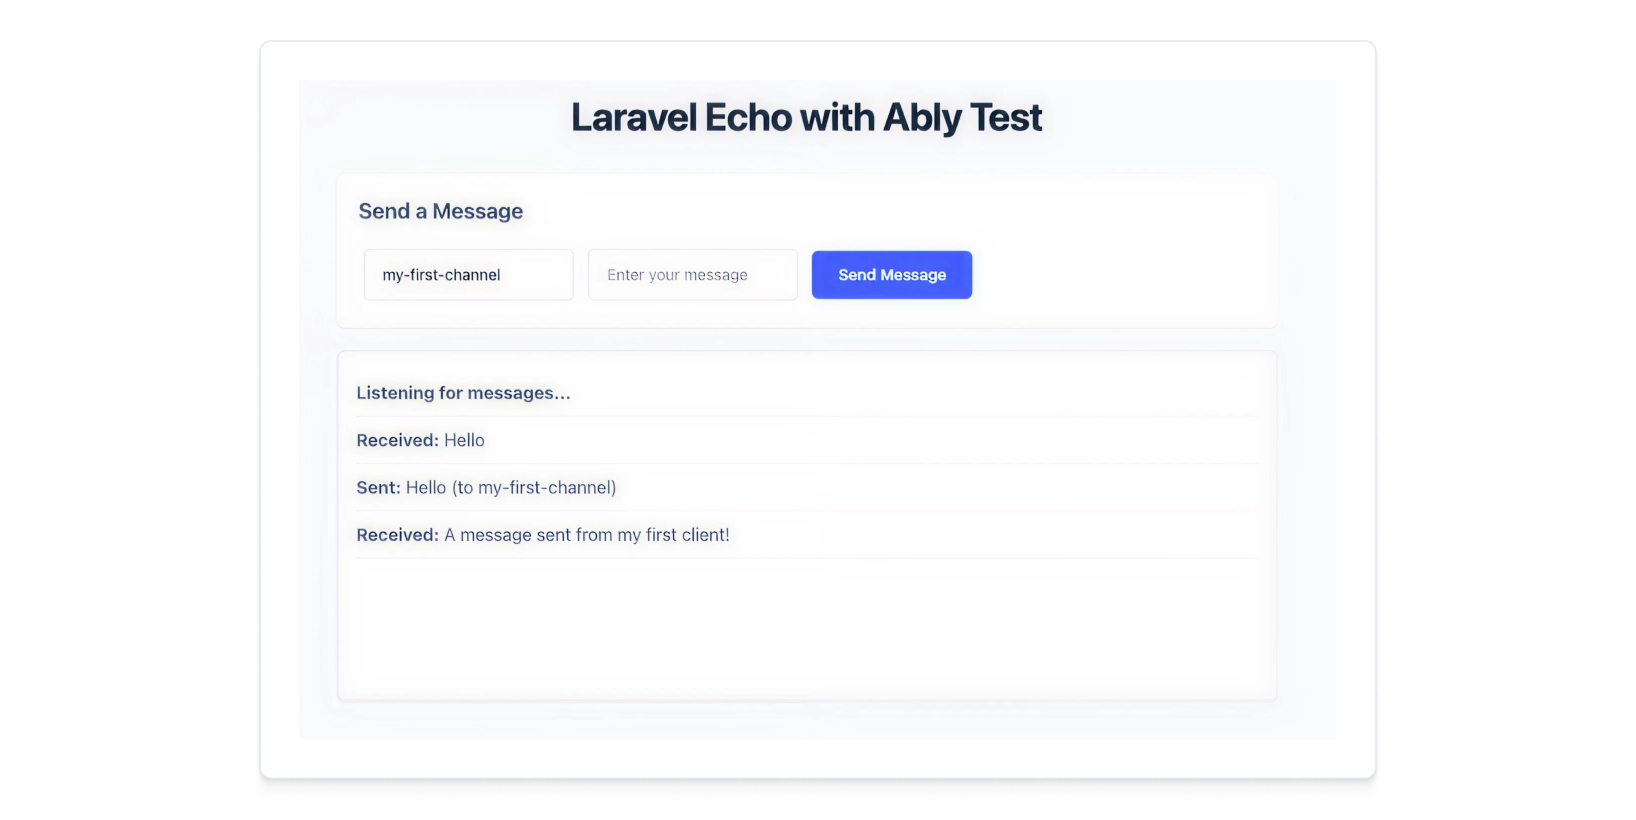
In your browser, open the url `http://localhost:8000/echo` to see the frontend page.
Use `curl` or any HTTP client to send a POST request, you should see the message appear in the `#messages` div on the page:
```shell
curl --location --request POST 'localhost:8000/api/public-event' \
--header 'Content-Type: application/json' \
--data-raw '{
"channelName":"my-first-channel",
"message":"A message sent from my first client!"
}'
```
## Next steps
Continue to explore the documentation with PHP as the selected framework:
* Read more about [Ably Laravel Echo](https://github.com/ably-forks/laravel-echo).
* Learn more about [Laravel Broadcasting](https://laravel.com/docs/broadcasting).
* Explore the [Ably Laravel Broadcast app](https://github.com/ably-labs/laravel-broadcast-app) - a comprehensive example that builds upon this guide with features like:
* User authentication (registration + login),
* Public channels for guests,
* Private channels with presence for authenticated users,
* Typing indicators,
* Multi-room support.
You can also explore the [Ably CLI](https://www.npmjs.com/package/@ably/cli) further, or visit the Pub/Sub [API references](https://ably.com/docs/api/rest-sdk?lang=php).