# Getting started: Chat with Android
This guide will help you get started with Ably Chat in a new Android Kotlin application built with Jetpack Compose.
You'll learn how to create chat rooms, send and edit messages, and implement realtime features like typing indicators and presence. You'll also cover message history, reactions, and proper connection management.
## Prerequisites
### Ably
1. [Sign up](https://ably.com/signup) for an Ably account.
2. Create a [new app](https://ably.com/accounts/any/apps/new), and get your first API key. You can use the root API key that is provided by default, within the **API Keys** tab to get started.
### Create a new project
Create a new Android project with Jetpack Compose. For detailed instructions, refer to the [Android Studio documentation](https://developer.android.com/jetpack/compose/setup).
1. Create a new Android project in Android Studio.
2. Select **Empty Activity** as the template.
3. Name the project **Chat Example** and place it in the `com.example.chatexample` package.
4. Set the minimum SDK level to API 24 or higher.
5. Select Kotlin as the programming language.
6. Add the Ably dependencies to your app-level `build.gradle.kts` file:
```kotlin
implementation("com.ably.chat:chat:")
// This package contains extension functions for better Jetpack Compose integration.
// It's experimental for now (safe to use, but the API may change later). You can always use its code as a reference.
implementation("com.ably.chat:chat-extensions-compose:")
```
### (Optional) Install Ably CLI
Use the [Ably CLI](https://github.com/ably/cli) as an additional client to quickly test chat features. It can simulate other users by sending messages, entering presence, and acting as another user typing a message.
1. Install the Ably CLI:
```shell
npm install -g @ably/cli
```
2. Run the following to log in to your Ably account and set the default app and API key:
```shell
ably login
```
## Step 1: Setting up Ably
Replace the contents of your `MainActivity.kt` file with the following code to set up the Ably client.
Note that this is for example purposes only. In production, you should use [token authentication](https://ably.com/docs/auth/token.md) to avoid exposing your API keys publicly, the [`clientId`](https://ably.com/docs/auth/identified-clients.md) is used to identify the client:
```kotlin
package com.example.chatexample

import android.os.Bundle
import android.util.Log
import androidx.activity.ComponentActivity
import androidx.activity.compose.setContent
import androidx.activity.enableEdgeToEdge
import androidx.compose.foundation.layout.*
import androidx.compose.foundation.lazy.*
import androidx.compose.material.icons.*
import androidx.compose.material.icons.automirrored.filled.Send
import androidx.compose.material.icons.filled.Edit
import androidx.compose.material3.*
import androidx.compose.runtime.*
import androidx.compose.ui.*
import androidx.compose.ui.graphics.Color
import androidx.compose.ui.text.input.TextFieldValue
import androidx.compose.ui.unit.*
import com.example.chatexample.ui.theme.ChatExampleTheme
import com.ably.chat.*
import com.ably.chat.extensions.compose.*
import io.ably.lib.realtime.AblyRealtime
import io.ably.lib.types.ClientOptions
import kotlinx.coroutines.launch
import java.text.*
import java.util.*

class MainActivity : ComponentActivity() {
    private lateinit var realtimeClient: AblyRealtime
    private lateinit var chatClient: ChatClient

    override fun onCreate(savedInstanceState: Bundle?) {
        super.onCreate(savedInstanceState)

        realtimeClient = AblyRealtime(
            ClientOptions().apply {
                key = "your-api-key" // In production, you should use token authentication to avoid exposing your API keys publicly
                clientId = "my-first-client"
            },
        )

        chatClient = ChatClient(realtimeClient) { logLevel = LogLevel.Info }

        enableEdgeToEdge()
        setContent {
            ChatExampleTheme {
                App(chatClient)
            }
        }
    }
}

@Composable
fun App(chatClient: ChatClient) {
    Scaffold { paddingValues ->
        Column(
            modifier = Modifier
                .fillMaxSize()
                .imePadding()
                .padding(paddingValues)
        ) {
            Text("Hello Chat App")
        }
    }
}
```
## Step 2: Connect to Ably
Clients establish a connection with Ably when they instantiate an SDK. This enables them to send and receive messages in realtime across channels.
In your `MainActivity.kt` file, add the following `ConnectionStatusUi` composable component:
```kotlin
// This component will display the current connection status
@Composable
fun ConnectionStatusUi(connection: Connection) {
    val connectionStatus by connection.collectAsStatus()
    Text(
        text = "Connection Status: $connectionStatus",
        style = MaterialTheme.typography.bodyMedium,
        modifier = Modifier.padding(start = 8.dp)
    )
}
```
Update the `App` component to display the connection status using the new `ConnectionStatusUi` component:
```kotlin
@Composable
fun App(chatClient: ChatClient) {
    Scaffold { paddingValues ->
        Column(
            modifier = Modifier
                .fillMaxSize()
                .imePadding()
                .padding(paddingValues)
        ) {
            ConnectionStatusUi(connection = chatClient.connection)
        }
    }
}
```
Run your application by pressing **Run** button.
## Step 3: Create a room
Now that you have a connection to Ably, you can create a room. Use rooms to separate and organize clients and messages into different topics, or 'chat rooms'. Rooms are the entry point for Chat, providing access to all of its features, such as messages, presence and reactions.
In your project, open `MainActivity.kt`, and add a new component called `RoomStatusUi`:
```kotlin
@Composable
fun RoomStatusUi(roomName: String, room: Room?) {
    val roomStatus = room?.collectAsStatus()?.value
    Text(
        text = "Room Name: ${roomName}, Room Status: ${roomStatus ?: ""}",
        style = MaterialTheme.typography.bodyMedium,
        modifier = Modifier.padding(start = 8.dp)
    )
}
```
Update your main app component to get and attach to the room and nest the `RoomStatusUi` component inside it:
```kotlin
@Composable
fun App(chatClient: ChatClient) {
    val roomName = "my-first-room"
    var room by remember { mutableStateOf(null) }
    LaunchedEffect(roomName) {
        val chatRoom = chatClient.rooms.get(roomName)
        chatRoom.attach()
        room = chatRoom
    }
    Scaffold { paddingValues ->
        Column(
            modifier = Modifier
                .fillMaxSize()
                .imePadding()
                .padding(paddingValues)
        ) {
            ConnectionStatusUi(connection = chatClient.connection)
            RoomStatusUi(roomName = roomName, room = room)
        }
    }
}
```
The above code creates a room with the ID `my-first-room` and sets up a listener to monitor the room status. It also displays the room ID and current status in the UI.
## Step 4: Send a message
Messages are how your clients interact with one another.
In your project, open `MainActivity.kt`, and add a new component called `ChatBox`:
```kotlin
@Composable
fun ChatBox(room: Room?) {
    val scope = rememberCoroutineScope()
    var textInput by remember { mutableStateOf(TextFieldValue("")) }
    var sending by remember { mutableStateOf(false) }
    val messages = remember { mutableStateListOf() }

    LaunchedEffect(room) {
        room?.messages?.asFlow()?.collect { event ->
            when (event.type) {
                MessageEventType.Created -> {
                    // Check if the incoming message is correctly ordered
                    if (messages.isNotEmpty() && messages[0].serial > event.message.serial) {
                        // If the message arrived out of order - you should find the correct insertion point based on serial
                        // This is omitted for brevity, but production code should maintain serial order
                    }
                    messages.add(0, event.message)
                }
                else -> Unit
            }
        }
    }

    Column(
        modifier = Modifier
            .fillMaxWidth()
            .padding(8.dp)
    ) {
        Card(
            modifier = Modifier
                .weight(1f)
                .fillMaxWidth(),
        ) {
            if (messages.isNullOrEmpty()) {
                Box(
                    modifier = Modifier.fillMaxSize(),
                    contentAlignment = Alignment.Center
                ) {
                    Text(
                        text = "No messages yet",
                        color = Color.Gray
                    )
                }
            } else {
                LazyColumn(
                    modifier = Modifier
                        .fillMaxSize()
                        .padding(8.dp),
                    reverseLayout = true,
                ) {
                    items(messages.size, key = { messages[it].serial }) {
                        val message = messages[it]
                        Column(
                            modifier = Modifier
                                .fillMaxWidth()
                                .padding(vertical = 4.dp)
                        ) {
                            Text(
                                text = "${message.clientId}: ${message.text}",
                                style = MaterialTheme.typography.bodyMedium
                            )
                            Text(
                                text = SimpleDateFormat("HH:mm:ss", Locale.getDefault())
                                    .format(Date(message.timestamp)),
                                style = MaterialTheme.typography.labelSmall,
                                color = Color.Gray,
                                modifier = Modifier.align(Alignment.End)
                            )
                            HorizontalDivider(modifier = Modifier.padding(top = 4.dp))
                        }
                    }
                }
            }
        }

        Spacer(modifier = Modifier.height(8.dp))

        // Message input
        Row(
            modifier = Modifier.fillMaxWidth(),
            verticalAlignment = Alignment.CenterVertically
        ) {
            OutlinedTextField(
                value = textInput,
                onValueChange = { textInput = it },
                modifier = Modifier.weight(1f),
                placeholder = { Text("Type a message") },
                maxLines = 3
            )

            Spacer(modifier = Modifier.width(8.dp))

            Button(
                onClick = {
                    sending = true
                    if (textInput.text.isNotBlank()) {
                        scope.launch {
                            try {
                              room?.messages?.send(textInput.text)
                            } catch (e: Exception) {
                              Log.e("APP", e.message, e)
                            }
                            textInput = TextFieldValue("")
                            sending = false
                        }
                    }
                },
                enabled = textInput.text.isNotBlank() && !sending
            ) {
                Icon(
                    imageVector = Icons.AutoMirrored.Filled.Send,
                    contentDescription = "Send"
                )
            }
        }
    }
}
```
Add the `ChatBox` component to your main app component:
```kotlin
@Composable
fun App(chatClient: ChatClient) {
    val roomName = "my-first-room"
    var room by remember { mutableStateOf(null) }
    LaunchedEffect(roomName) {
        val chatRoom = chatClient.rooms.get(
            roomName,
        )
        chatRoom.attach()
        room = chatRoom
    }

    Scaffold { paddingValues ->
        Column(
            modifier = Modifier
                .fillMaxSize()
                .imePadding()
                .padding(paddingValues)
        ) {
            ConnectionStatusUi(connection = chatClient.connection)
            RoomStatusUi(roomName = roomName, room = room)

            HorizontalDivider(modifier = Modifier.padding(vertical = 8.dp))

            ChatBox(room = room)
        }
    }
}
```
The UI should automatically render the new component, and you should be able to send messages to the room.
Type a message in the input box and click the send button. You'll see the message appear in the chat box.
You can also use the Ably CLI to send a message to the room from another environment:
```shell
ably rooms messages send my-first-room 'Hello from CLI!'
```
You'll see the message in your app's chat box UI. If you have sent a message via CLI, it should appear in a different color to the one you sent from the app.
## Step 5: Edit a message
If your client makes a typo, or needs to update their original message then they can edit it. To do this, you can extend the functionality of the `ChatBox` component to allow updating of messages.
1. We will begin by adding this utility function to facilitate message data updates in the UI:
 ```kotlin
 inline fun  MutableList.replaceFirstWith(replacement: T, predicate: (T) -> Boolean) {
     val index = indexOfFirst(predicate)
     if (index != -1) set(index, replacement)
 }
 ```
2. Add the edited state variable:
```kotlin
var edited: Message? by remember { mutableStateOf(null) }
```
3. Update the message subscription to handle edited messages:
```kotlin
LaunchedEffect(room) {
    room?.messages?.asFlow()?.collect { event ->
        when (event.type) {
            MessageEventType.Created -> messages.add(0, event.message)
            MessageEventType.Updated -> messages.replaceFirstWith(event.message) {
                it.serial == event.message.serial
            }
            else -> Unit
        }
    }
}
```
4. Let's enhance the message display. To add an edit button to each message, we'll first need to locate
the `Column` composable function within your layout inside the `items(messages.size, key = { messages[it].serial }) {` declarative loop. This is the component responsible for rendering
the message content itself, along with the sender's username and the message timestamp.
Once we've identified this `Column`, we will integrate the new edit button alongside these existing elements. Replace the `Column` with the following:
```kotlin
Row(
    modifier = Modifier.fillMaxWidth(),
    verticalAlignment = Alignment.CenterVertically
) {
    Column(
        modifier = Modifier
            .weight(1f)
            .padding(vertical = 4.dp)
    ) {
        // Message content
        Text(
            text = "${message.clientId}: ${message.text}",
            style = MaterialTheme.typography.bodyMedium
        )
        // Timestamp
        Text(
            text = SimpleDateFormat("HH:mm:ss", Locale.getDefault())
                .format(Date(message.timestamp)),
            style = MaterialTheme.typography.labelSmall,
            color = Color.Gray,
            modifier = Modifier.align(Alignment.End)
        )
        HorizontalDivider(modifier = Modifier.padding(top = 4.dp))
    }
    // Edit button
    IconButton(onClick = {
        edited = message
        textInput = TextFieldValue(message.text)
    }) {
        Icon(Icons.Default.Edit, contentDescription = "Edit")
    }
}
```
5. Update the send button to handle both new messages and edits:
```kotlin
Button(
    onClick = {
        sending = true
        if (textInput.text.isNotBlank()) {
            scope.launch {
                try {
                    edited?.let {
                        room?.messages?.update(it.copy(text = textInput.text))
                    } ?: room?.messages?.send(textInput.text)
                } catch (e: Exception) {
                    Log.e("APP", e.message, e)
                }
                edited = null
                textInput = TextFieldValue("")
                sending = false
            }
        }
    },
    enabled = textInput.text.isNotBlank() && !sending
) {
    Icon(
        imageVector = if (edited != null) Icons.Filled.Edit
                     else Icons.AutoMirrored.Filled.Send,
        contentDescription = if (edited != null) "Edit" else "Send"
    )
}
```
When you click on the edit button in the UI, you can modify the text and it will send the updated message contents to the room.
## Step 6: Message history and continuity
Ably Chat enables you to retrieve previously sent messages in a room. This is useful for providing conversational context when a user first joins a room, or when they subsequently rejoin it later on. The message subscription object exposes the [`historyBeforeSubscribe()`](https://sdk.ably.com/builds/ably/ably-chat-kotlin/main/dokka/chat/com.ably.chat/-messages-subscription/history-before-subscribe.html) method to enable this functionality. This method returns a paginated response, which can be queried further to retrieve the next set of messages.
Extend the `ChatBox` component to include a method to retrieve the last 10 messages when the component mounts. In your `MainActivity.kt` file, add the `DisposableEffect` in your `ChatBox` component:
```kotlin
fun ChatBox(room: Room?) {
    /* variables declaration */
    var subscription by remember { mutableStateOf(null) }

    DisposableEffect(room) {
      subscription = room?.messages?.subscribe { event ->
          when (event.type) {
              MessageEventType.Created -> messages.add(0, event.message)
              MessageEventType.Updated -> messages.replaceFirstWith(event.message) {
                  it.serial == event.message.serial
              }
              else -> Unit
          }
      }

      onDispose {
          subscription?.unsubscribe()
      }
    }

    LaunchedEffect(subscription) {
        subscription?.let { sub ->
            val previousMessages = sub.historyBeforeSubscribe(10)?.items ?: emptyList()
            messages.addAll(previousMessages)
        }
    }

    /* rest of your code */
}
```
The above code will retrieve the last 10 messages when the component mounts, and set them in the state.
You also can use `collectAsPagingMessagesState` to automatically subscribe to new messages
and lazily load previous messages as you scroll through the message list.
```kotlin
@Composable
fun ChatBox(room: Room?) {
    val scope = rememberCoroutineScope()
    var textInput by remember { mutableStateOf(TextFieldValue("")) }
    val messagesState = room?.collectAsPagingMessagesState()
    var sending by remember { mutableStateOf(false) }
    var edited by remember { mutableStateOf(null) }
    val messages = messagesState?.loaded

    Column(
        modifier = Modifier
            .fillMaxWidth()
            .padding(8.dp)
    ) {
        Card(
            modifier = Modifier
                .weight(1f)
                .fillMaxWidth(),
        ) {
            if (messages.isNullOrEmpty()) {
                Box(
                    modifier = Modifier.fillMaxSize(),
                    contentAlignment = Alignment.Center
                ) {
                    Text(
                        text = "No messages yet",
                        color = Color.Gray
                    )
                }
            } else {
                LazyColumn(
                    modifier = Modifier
                        .fillMaxSize()
                        .padding(8.dp),
                    reverseLayout = true,
                    state = messagesState.listState,
                ) {
                    items(messages.size, key = { messages[it].serial }) {
                        val message = messages[it]
                        Row(
                            modifier = Modifier.fillMaxWidth(),
                            verticalAlignment = Alignment.CenterVertically
                        ) {
                            Column(
                                modifier = Modifier
                                    .weight(1f)
                                    .padding(vertical = 4.dp)
                            ) {
                                Text(
                                    text = "${message.clientId}: ${message.text}",
                                    style = MaterialTheme.typography.bodyMedium
                                )
                                Text(
                                    text = SimpleDateFormat("HH:mm:ss", Locale.getDefault())
                                        .format(Date(message.timestamp)),
                                    style = MaterialTheme.typography.labelSmall,
                                    color = Color.Gray,
                                    modifier = Modifier.align(Alignment.End)
                                )
                                HorizontalDivider(modifier = Modifier.padding(top = 4.dp))
                            }
                            IconButton(onClick = {
                                edited = message
                                textInput = TextFieldValue(message.text)
                            }) {
                                Icon(Icons.Default.Edit, contentDescription = "Edit")
                            }
                        }
                    }
                }
            }
        }

        Spacer(modifier = Modifier.height(8.dp))

        // Message input
        Row(
            modifier = Modifier.fillMaxWidth(),
            verticalAlignment = Alignment.CenterVertically
        ) {
            OutlinedTextField(
                value = textInput,
                onValueChange = { textInput = it },
                modifier = Modifier.weight(1f),
                placeholder = { Text("Type a message") },
                maxLines = 3
            )

            Spacer(modifier = Modifier.width(8.dp))

            Button(
                onClick = {
                    sending = true
                    if (textInput.text.isNotBlank()) {
                        scope.launch {
                            try {
                                edited?.let {
                                    room?.messages?.update(it.copy(text = textInput.text))
                                } ?: room?.messages?.send(textInput.text)
                            } catch (e: Exception) {
                                Log.e("APP", e.message, e)
                            }
                            edited = null
                            textInput = TextFieldValue("")
                            sending = false
                        }
                    }
                },
                enabled = textInput.text.isNotBlank() && !sending
            ) {
                Icon(
                    imageVector = if (edited != null) Icons.Default.Edit
                             else Icons.AutoMirrored.Filled.Send,
                    contentDescription = if (edited != null) "Edit" else "Send"
                )
            }
        }
    }
}
```
Do the following to test this out:
1. Use the ably CLI to simulate sending some messages to the room from another client.
2. Refresh the page, this will cause the `ChatBox` component to mount again and call the `historyBeforeSubscribe()` method.
3. You'll see the last 10 messages appear in the chat box.
## Step 7: Display who is present in the room
Display the online status of clients using the presence feature. This enables clients to be aware of one another if they are present in the same room. You can then show clients who else is online, provide a custom status update for each, and notify the room when someone enters it, or leaves it, such as by going offline.
In your `MainActivity.kt` file, create a new component called `PresenceStatusUi`:
```kotlin
@Composable
fun PresenceStatusUi(room: Room?) {
    val membersState = room?.collectAsPresenceMembers()
    val members = membersState?.value ?: emptyList()

    LaunchedEffect(room) {
        room?.presence?.enter()
    }

    Text(
        text = "Online: ${members.size}",
        style = MaterialTheme.typography.bodyMedium,
        modifier = Modifier.padding(start = 8.dp)
    )
}
```
Add the `PresenceStatusUi` component to your main app component:
```kotlin
@Composable
fun App(chatClient: ChatClient) {
    val roomName = "my-first-room"
    var room by remember { mutableStateOf(null) }
    LaunchedEffect(roomName) {
        val chatRoom = chatClient.rooms.get(
            roomName,
        )
        chatRoom.attach()
        room = chatRoom
    }

    Scaffold { paddingValues ->
        Column(
            modifier = Modifier
                .fillMaxSize()
                .imePadding()
                .padding(paddingValues)
        ) {
            ConnectionStatusUi(connection = chatClient.connection)
            RoomStatusUi(roomName = roomName, room = room)
            PresenceStatusUi(room = room)

            HorizontalDivider(modifier = Modifier.padding(vertical = 8.dp))

            ChatBox(room = room)
        }
    }
}
```
You'll now see your current client ID in the list of present users.
You can also use the Ably CLI to enter the room from another client by running the following command:
```shell
ably rooms presence enter my-first-room
```
## Step 8: Send a reaction
Clients can send a reaction to a room to show their sentiment for what is happening, such as a point being scored in a sports game. These are short-lived (ephemeral) and are not stored in the room history.
In your `MainActivity.kt` file, add a new component called `ReactionBar`:
```kotlin
@Composable
fun ReactionBar(room: Room?) {
    val scope = rememberCoroutineScope()
    val availableReactions = listOf("👍", "❤️", "💥", "🚀", "👎", "💔")
    val receivedReactions = remember { mutableStateListOf() }

    LaunchedEffect(room) {
        room?.reactions?.asFlow()?.collect {
            receivedReactions.add(it)
        }
    }

    Column(
        modifier = Modifier.fillMaxWidth(),
        horizontalAlignment = Alignment.CenterHorizontally
    ) {
        // Reaction send buttons
        LazyRow(
            modifier = Modifier.fillMaxWidth(),
            horizontalArrangement = Arrangement.SpaceEvenly,
            contentPadding = PaddingValues(vertical = 4.dp)
        ) {
            items(availableReactions) { emoji ->
                Button(
                    onClick = {
                        scope.launch {
                            room?.reactions?.send(emoji)
                        }
                    },
                    colors = ButtonDefaults.buttonColors(containerColor = Color.LightGray)
                ) {
                    Text(
                        text = emoji,
                        fontSize = 12.sp
                    )
                }
            }
        }

        // Display received reactions
        if (receivedReactions.isNotEmpty()) {
            Spacer(modifier = Modifier.height(4.dp))
            Text(
                text = "Received Reactions",
                modifier = Modifier.padding(vertical = 2.dp)
            )

            LazyRow(
                modifier = Modifier.fillMaxWidth(),
                horizontalArrangement = Arrangement.Center,
                contentPadding = PaddingValues(vertical = 4.dp)
            ) {
                items(receivedReactions) { reaction ->
                    Box(
                        contentAlignment = Alignment.Center
                    ) {
                        Column(
                            horizontalAlignment = Alignment.CenterHorizontally
                        ) {
                            Text(
                                text = reaction.reaction.name,
                                fontSize = 12.sp
                            )
                        }
                    }
                }
            }
        }
    }
}
```
Add the `ReactionBar` component to your main app component:
```kotlin
@Composable
fun App(chatClient: ChatClient) {
    val roomName = "my-first-room"
    var room by remember { mutableStateOf(null) }
    LaunchedEffect(roomName) {
        val chatRoom = chatClient.rooms.get(
            roomName,
        )
        chatRoom.attach()
        room = chatRoom
    }

    Scaffold { paddingValues ->
        Column(
            modifier = Modifier
                .fillMaxSize()
                .imePadding()
                .padding(paddingValues)
        ) {
            ConnectionStatusUi(connection = chatClient.connection)
            RoomStatusUi(roomName = roomName, room = room)
            PresenceStatusUi(room = room)
            ReactionBar(room = room)

            HorizontalDivider(modifier = Modifier.padding(vertical = 8.dp))

            ChatBox(room = room)
        }
    }
}
```
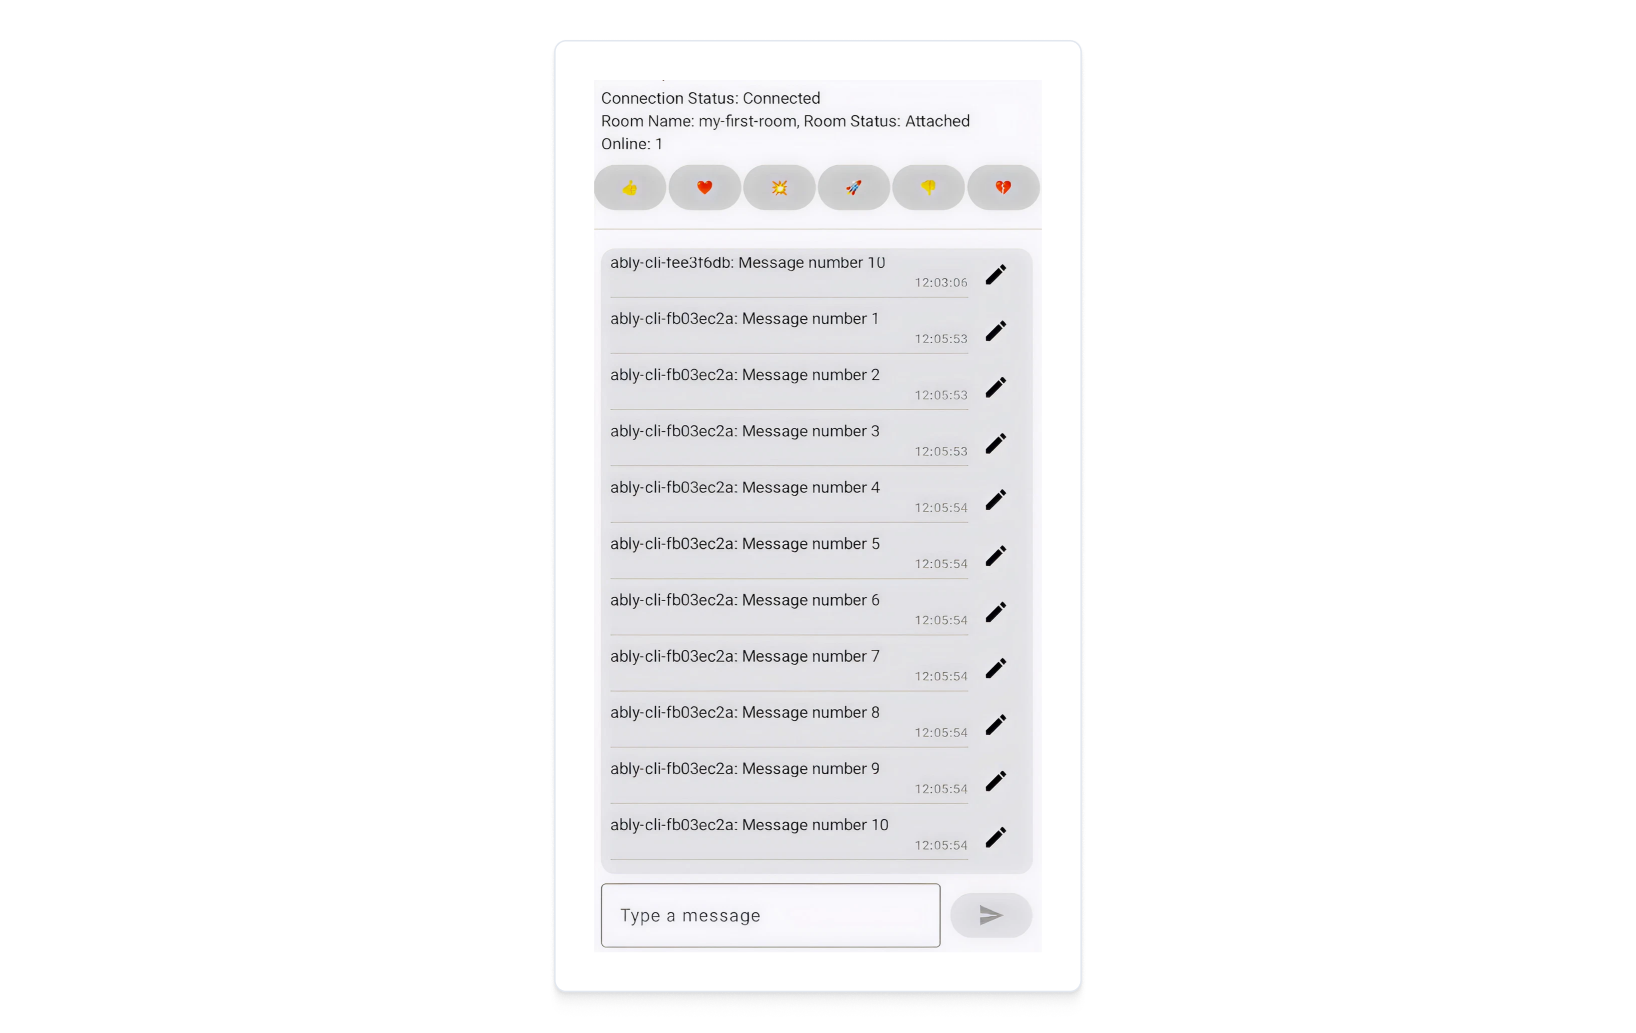
The above code should display a list of reactions that can be sent to the room. When you click on a reaction, it will send it to the room and display it in the UI.
You can also send a reaction to the room via the Ably CLI by running the following command:
```shell
ably rooms reactions send my-first-room 👍
```
## Step 9: Disconnection and clean up resources
To gracefully close connection and clean up resources, you can subscribe to activity lifecycle events and close the connection when activity has paused or stopped, and then reconnect when activity resumes. To do this modify `MainActivity` class:
```kotlin
class MainActivity : ComponentActivity() {
    private lateinit var realtimeClient: AblyRealtime
    private lateinit var chatClient: ChatClient

    override fun onCreate(savedInstanceState: Bundle?) {
        super.onCreate(savedInstanceState)

        realtimeClient = AblyRealtime(
            ClientOptions().apply {
                key = "your-api-key"
                clientId = "my-first-client"
            },
        )

        chatClient = ChatClient(realtimeClient) { logLevel = LogLevel.Info }

        enableEdgeToEdge()
        setContent {
            ChatExampleTheme {
                App(chatClient)
            }
        }
    }

    override fun onRestart() {
        super.onRestart()
        realtimeClient.connect()
    }

    override fun onResume() {
        super.onResume()
        realtimeClient.connect()
    }

    override fun onPause() {
        super.onPause()
        realtimeClient.close()
    }

    override fun onStop() {
        super.onStop()
        realtimeClient.close()
    }
}
```
## Next steps
Continue to explore the documentation with Kotlin as the selected language:
* Understand [token authentication](https://ably.com/docs/auth/token.md) before going to production.
* Read more about using [rooms](https://ably.com/docs/chat/rooms.md) and sending [messages](https://ably.com/docs/chat/rooms/messages.md).
* Find out more regarding [presence](https://ably.com/docs/chat/rooms/presence.md).
* Read into pulling messages from [history](https://ably.com/docs/chat/rooms/history.md) and providing context to new joiners.
Explore the [Ably CLI](https://www.npmjs.com/package/@ably/cli) further, or check out the [Chat Kotlin API references](https://sdk.ably.com/builds/ably/ably-chat-kotlin/main/dokka/chat/com.ably.chat/) for additional functionality.